In this article we take you through the basics of scoring your cross country meet with RaceTab. And it really is fairly simple, especially if you have even a little bit of a technical bent.
The first thing you will want to do, and you should do this before you assemble your meet packets, is to assign each competitor a number. This number is very likely a bib number, but it could be a pull tag number, or even a number written on a sticker you will collect at the finish line. I'll direct you to a few different sources for bib numbers at the end of this article.
To do the bib number assignments, simply click on the Athletes tab. When you go there, you should see a list of all athletes entered in the race. Next, click on Assign above the list of athlete names.
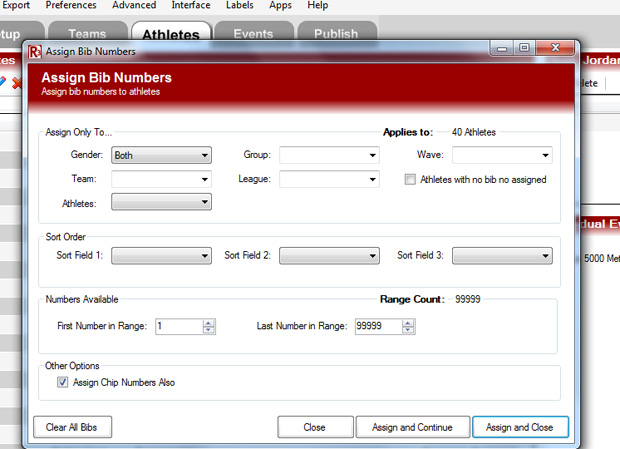
This will produce a dialog whereby you can assign bib numbers to every competitor in the race. The dialog will appear as shown below:

You are free to experiment with other options, but it's easiest to assign all bib numbers for Both genders at once. The only other option you need to set is the First Number in Range. If your bib numbers start at 200 and continue from there, you'll set this number to 200 and then click Assign and Close. Every competitor in your event has now been assigned a bib (or competitor) number. You'll need these numbers for scoring.
At this point, you want to print labels for all competitors in your meet. The labels utility in RaceTab is designed to print labels on standard sheets of mailing labels, three wide and ten high. You can access the labeling utility by clicking on Labels on the top menu bar. The mock-up shown illustrates how your labels will print. All the settings are in the right-hand column. Note that labels print with a bar coded number. Although you don't have to use the bar coded numbers, a bar code scanner will cut your data entry time at the end of the race into about one-third of what it would otherwise be and eliminate 99.9% of any errors you might otherwise make with competitor number entry.
USB Bar code scanners can be purchased for about $30 and up at any of a variety of online sources. I highly recommend using a bar code scanner for entering runner numbers at the end of the race, but many people have successfully entered those numbers by hand.
When your labels are printed, either affix the labels to the appropriate bibs or place the labels for each team in the appropriate meet packet. Note that if you plan to have competitors run with labels stuck to their singlets, you will want a backup listing of the competitor numbers. Labels, as we all know, have a way of falling off during the race.
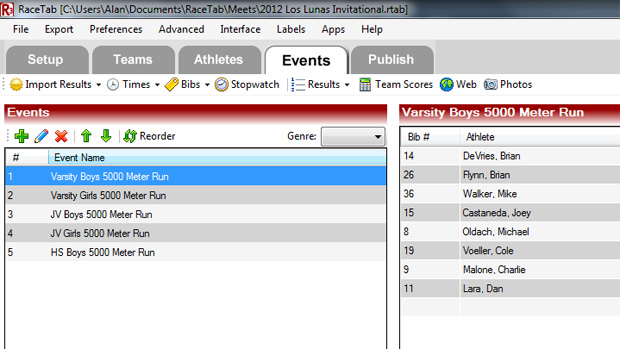
You are now ready for racing. Open the Events tab of your meet in RaceTab.
To score the race, there are two things you need to think about--getting the competitor numbers in their proper order and getting times for all runners. We'll discuss getting runner numbers in order first.
If you are using bibs or pull tags, I strongly recommend purchasing a set of metal stringers from Rainbow Racing. Properly held, these are very difficult to drop and very easy to lock once all of the runners are through the chute. You have one person working your chute who is in charge of nothing else except collecting the tag (with label attached!) from each runner's bib as they come through. You only need one stringer per race, but if you are running two varsity and two JV races at your meet, you will want to have four stringers. It's very risky removing tags from a stringer before all race events have been scored. Just trust me on that one if it's not already evident why.
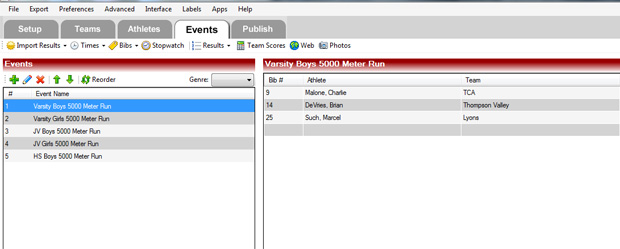
When all of the runners are through the chute for a particular race, the chute person locks the stringer, walks over to the scoring table, hands the stringer with all tags to the scorer and identifies the first-place runner's tag to the scorer and, possibly, an assistant who will help with reading the labels. Starting with the first-place runner, the competitor numbers are read into the computer, either manually or via a bar code scanner. Each time a number is entered, a new line as added to the scoring window of the Events tab:

Continue to enter runner numbers until all competitors have been entered for your race. Next, you will need times.
You can time your race on the same computer you use to score the race, but this is not the recommended procedure since the stopwatch utility monopolizes the desktop while it is in use. It is far better to bring a second laptop with RaceTab loaded to do your timing. The rest of the article here will assume you have done that. Since RaceTab is free, there is no issue with loading copies onto multiple computers.
The stopwatch utility is located on the Events tab, on the menu bar directly below the main tabs. Click on Stopwatch. This puts the stopwatch utility at the bottom of your events screen and produces a dialog asking you to name your timing session. Name the session something you are likely to remember and drag the top edge of the stopwatch feature up a little to get a little more real estate on your screen, if needed. If you're using a laptop, it's likely you'll need a little extra room to see all the stopwatch buttons.
It's a good idea to practice with Stopwatch a little before the race if you've never used RaceTab before, but the idea is to start the timer when the race starts (or set the timer to 10:00 and start it when the race clock hits 10:00, or something of that sort), click on Split every time a runner crosses the finish line, click on Stop once all runners have finished, and Export your timing session to a flash drive.
One slick way to click on Split each time a runner crosses the finish line is to program a presenter device (such as speakers often use for Power Point presentations) to simulate a click on your mouse each time it is clicked. It's easier to hold a presenter in your hand by the finish line than to lug around even a small computer next to the finish line. Otherwise, make certain to cordon off an area around the finish line for whomever is collecting your race times. A chair and table is nice to have as well in this situation.
Transport your flash drive to the scoring computer. Click on Times from the menu bar below the tabs, and then click on Import from RaceTab Timing Session. Locate the timing file on your flash drive and import into your race.
Alternately, you can collect times by hand (this probably takes two people at the finish line with a pencil and clipboard, or one person with a printing stopwatch), take the list of times to the scoring table when the race is complete, and transcribe those numbers into the time column of the scoring window of RaceTab. If your race is not especially large, this option can be a very good option.
Assuming your number of times equals your number of competitors, you are now ready to score the race. If the numbers don't match, consult with your timer and chute person to see if they know of any misses or extra clicks. If you have an extra meet worker available, it's never a bad idea to have him/her writing down every 10th finisher or so and that runner's time. This is a nice way to pinpoint where any misses or extra clicks may have occurred. You don't always have the luxury of that extra meet worker, however.
To score the race, simply click on Score at the right-hand side of the scoring window. Presto, your race is scored!
If at this point you'd like a copy of the results of this race only to post, click on Results/This Event Only and print.
At the end of all races, it's easiest to produce results by going to the Publish tab and clicking on Complete Results (Columns). This will give you a finished and professional set of results. You can print this file, save it, e-mail it, and do whatever else you might need to do to get results distributed.
If this seems like a lot of detail to attend to, stop and break down how the scoring presently happens at your meet. Once you stop to think about each of the tasks, there's a lot of detail no matter how you do it, provided you're doing it well. The biggest beauty of using a meet management program lies in how quickly and accurately the race can be scored and in how easy it makes it to distribute results for all runners. Your first meet with a meet management program can be something of an ordeal, but the learning curve is very steep and subsequent meets start to go very smoothly. Soon, you be wondering why you ever did it any other way.
If this all seems like a little too much technical mumbo-jumbo to sort out, find a young person who is inclined toward computers and encourage him to hire himself (or herself!) out as a scoring company for cross country races. There is very little investment of capital in such an operation and, for someone who is willing to work hard and fast for a couple of hours once or twice a weekend, it can be a very nice little job on the side.
Sources for Bibs:
1. See if your local running store or any recent local races have leftover bibs they're willing to donate for your race.
2. Visit roadid.com. If you're willing to distribute their promotional material at your race, they are willing to supply you with free bibs for your race. It's a very good deal for you, as the race director. They also sell safety pins at very competitive prices.
3. Racing Rainbow produces and sells bibs. Depending on how many you purchase, prices start at about 20 cents per bib and go up from there.